
Nearly 90% of home cooks say this method makes peeling eggs easier, no matter the egg age or batch size — a surprising change from stove-top routines.
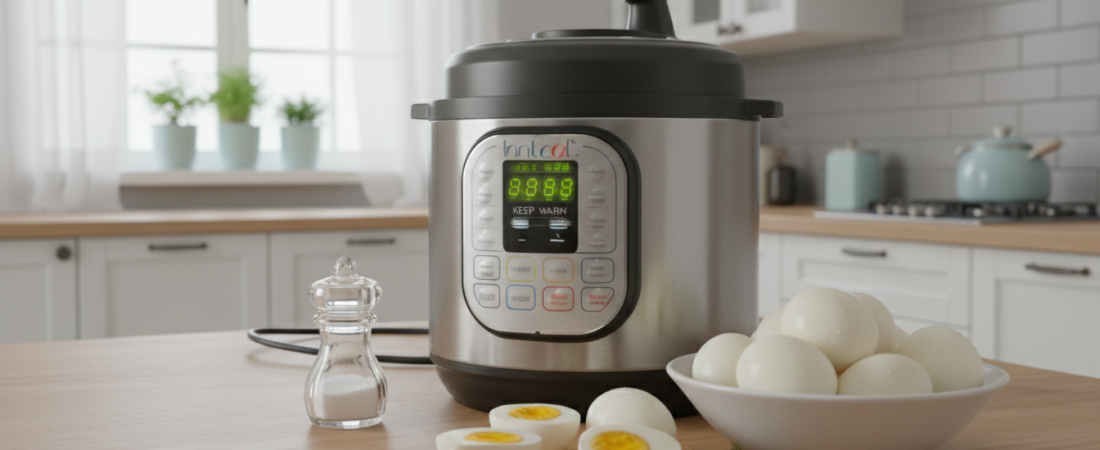
The magic is simple: high‑pressure cooking, a short natural release, then a fast ice bath. Try the classic 5-5-5 model (5 minutes cook, 5 minutes release, 5 minutes chill) or a 4‑minute cook for a creamier yolk.
This approach is hands-off and consistent, ideal for weekday meal prep. Remember: the display’s cook minutes start only after the unit pressurizes, which can add about 5–10 minutes to total time.
Perfect here means tender whites, yolks set to your liking, and shells that peel cleanly. The eggs are effectively steamed inside the cooker, which explains the steady results.
Use them for deviled eggs, egg salad lunches, or a quick, high‑protein snack from the fridge. This article includes a timing chart (classic and softer options), peeling tips, crack troubleshooting, and safe storage timelines to get reliable results every time.
Key Takeaways
- Hands-off method delivers consistent peeling and doneness.
- “5-5-5” is a reliable baseline; 4 minutes gives creamier yolks.
- Total time = pressurizing + cooking + release; factor in 5–10 extra minutes.
- Steaming action inside the cooker is why results stay uniform.
- Perfect for deviled eggs, salads, and quick protein snacks.
A Great Way to Get Started on the Right Foot!
14-Day Boiled Egg Diet Plan
Recipe Guide Printable Bundle
Healthy, easy meals laid out for you day-by-day. A simple two-week structure you can start immediately.
- 14 Daily Meal Ideas
- Printable PDF Guides
- Quick & Simple Recipes
- Instant Download

Instant Download! Start Right Away!
Why Instant Pot Eggs Come Out Easy-Peel and Consistently Cooked
A sealed, steamy environment and steady heat explain why many home cooks see cleaner shells and predictable yolks. The cooker holds heat and moisture so the protein sets evenly. That calm atmosphere differs from a wild stovetop boil where eggs bump and crack.
Steaming under pressure vs. stovetop boiling
On the stove, rolling water slams eggs and cooks unevenly at the edges. In a pressure cooker, steam and elevated pressure surround each egg. That even heat reduces overcooked rims and gives more uniform whites.
What changes the peel: steam, pressure, and rapid temperature shifts
Two common ideas explain the easy peel. One says steam creeps under the shell and separates the white from the membrane. The other, popularized by Alton Brown, points to a fast temperature shift inside a sealed vessel that loosens the membrane.
Neither theory is perfect, but both show why pressure cooking works. Quick cooling in an ice bath then stops carryover cooking so yolks stay just right. Technique matters too: crack at the air pocket and peel the membrane for the smoothest result. Best of all, this method scales—two eggs or a dozen—without fuss.
What You Need for Instant Pot Boiled Eggs
Start by gathering a handful of simple tools so pressure cooking goes smoothly. A short prep step keeps the process safe and consistent.

A Great Way to Get Started on the Right Foot!
14-Day Boiled Egg Diet Plan
Recipe Guide Printable Bundle
Healthy, easy meals laid out for you day-by-day. A simple two-week structure you can start immediately.
- 14 Daily Meal Ideas
- Printable PDF Guides
- Quick & Simple Recipes
- Instant Download
Instant Download! Start Right Away!
Essential gear
- Pressure cooker (an Instant Pot or similar), the inner pot, and a properly sealing lid with the valve set to “Sealing.”
- A metal trivet or steamer basket to lift items above the water and reduce cracking.
- Silicone‑tipped tongs, a pasta ladle, or a slotted spoon for safe transfers.
Water and ice bath details
Check your cooker manual for minimum liquid. If none is listed, add about 1 inch of water. Many people use about 1 cup cold water — that cup water rule works for most models.
Have a large mixing bowl or a clean sink ready with plenty of ice and cold water. Transfer hot items into the ice water quickly. For larger batches, refresh the ice as it warms.
Best Eggs to Use and How Many Fit in the Pot
Choose cold eggs from the refrigerator to make timing and results repeatable. Starting temperature matters because it standardizes cook time, so your method works the same each batch.
Cold fridge eggs for consistency
Cold eggs keep the run of variables low. If every egg starts at the same chill, the timer produces consistent whites and yolks.
Older vs. very fresh farm eggs
Older eggs usually peel more easily because the membrane loosens with age. Very fresh farm eggs can be stubborn.
If your farm produce resists peeling, let eggs sit on the counter for a few days following safe‑handling practices. A short rest can make a big difference.
Single layer, stacking, and egg racks
For a 6‑quart cooker many cooks fit about a dozen eggs in a single layer. Stacking is possible but raises the risk of cracked shells.
Use a trivet or steamer basket so eggs don’t touch the inner pot. An egg rack helps when you routinely cook larger batches and want stable stacking without crowding.
- Spacing tip: Don’t wedge eggs tightly together.
- Remove eggs promptly to an ice bath in the next section to stop carryover cooking.
The Core Method: High Pressure, Natural Pressure Release, Ice Bath
Begin with a simple checklist to ensure pressure, timing, and cooling sync up. This method uses high pressure on the manual or Pressure Cook button, a controlled natural pressure release, and a fast ice bath to stop cooking.
Set the lid and start cooking
Pour about 1 cup water into the inner pot, place a trivet, and set the eggs on top. Close the lid and move the valve to “Sealing.”
Press the Pressure Cook or older manual button, choose high pressure, and set the cook minutes per your timing chart.
When the timer actually starts
Expect about 5–10 minutes for the unit to come to pressure. The cook timer only begins after pressure builds. Plan total time as pressurize + cook minutes + release + ice bath.
Natural pressure release and why a separate timer helps
Let a 5-minute natural pressure release happen. Use a separate kitchen timer so you don’t overcook while you’re distracted. The natural pressure release lets carryover cooking slow down gently.
Quick-release the remaining pressure safely
After the planned natural period, quick-release any remaining pressure. Keep hands and face clear of the vent. Use a long tool if needed to flip the valve.
Transfer eggs to an ice water bath
Immediately remove eggs with tongs and place them into a prepared ice bath. The cold bath stops carryover cooking fast and keeps yolks tender. Let them chill for at least 5 minutes before peeling or storing.

A Great Way to Get Started on the Right Foot!
14-Day Boiled Egg Diet Plan
Recipe Guide Printable Bundle
Healthy, easy meals laid out for you day-by-day. A simple two-week structure you can start immediately.
- 14 Daily Meal Ideas
- Printable PDF Guides
- Quick & Simple Recipes
- Instant Download
Instant Download! Start Right Away!
| Step | Action | Typical minutes |
|---|---|---|
| 1 | Add water, set eggs on trivet, close lid, valve to Sealing | — |
| 2 | Press Pressure Cook / manual on high pressure | Cook minutes (per recipe) |
| 3 | Wait to come to pressure (timer starts after this) | 5–10 minutes |
| 4 | Allow natural pressure release, then quick-release remaining pressure | 5 minutes natural + quick-release |
| 5 | Remove eggs and transfer eggs to ice bath | 5+ minutes chilling |
Timing Guide for Yolks You Actually Want
Small shifts in minutes change the texture of the yolk more than you might expect. Below are three reliable timing patterns and a quick stovetop adjustment so you can pick the texture that fits your meal.
The classic 5-5-5 method
5 minutes high pressure, 5 minutes natural release, and 5 minutes in an ice bath. This method yields a fully set yolk ideal for deviled eggs and egg salad.
The 4-minute creamy option
Drop the cook time to 4 minutes for firm-but-tender whites and a creamy, fully cooked yolk. Many people prefer this texture for snacking or sandwiches.
The 3-3-3 softer set
The 3-3-3 method (3 cook, 3 release, 3 chill) gives a softer, jammy center. Use it for ramen, grain bowls, or salads that benefit from a silkier yolk.
Stovetop pressure cooker adjustments
Stovetop models can hit higher pressure faster. Start around 3 minutes cook time there and test once. Do a calibration batch to account for egg size and starting temperature.
Quick timing concept: Cook minutes + natural release minutes + ice bath minutes. Test one batch and note what each minute change does to the yolk so you can repeat meals with confidence.
| Method | Cook | Natural Release | Ice Bath |
|---|---|---|---|
| 5-5-5 (classic) | 5 min | 5 min | 5 min |
| Creamy firm | 4 min | 5 min | 5 min |
| Soft/jammy (3-3-3) | 3 min | 3 min | 3 min |
Peeling Tips for Smooth Shells and Clean Whites
A few smart moves at the sink make peeling fast and mostly mess-free. Focus on the air pocket, the thin membrane, and a little water to reduce tearing.

Crack from the large end to use the air pocket
Start at the large end. The air pocket gives you a natural gap to lift the shell and reach the membrane. That first lift often determines whether the peel stays whole or flakes.
Tap, loosen, and peel under the membrane (not just the shell)
Tap gently all over, then roll to loosen the shell. Peel from the large end and work under the thin membrane, not only the outer shell. Getting beneath the membrane protects the white and yields a smooth surface.
Peel in a bowl of water for extra slip
Try peeling inside a small bowl of cool water. Water slips between membrane and white and lifts small bits that might otherwise cling. You can also peel under a gentle stream for the same effect.
When an ice bath helps most (and what it doesn’t do)
The ice bath stops cooking fast and locks in timing so yolks stay as you intended. It helps the peel only indirectly — if the membrane still clings, cooling won’t fix it. Re-tap and use water to free stubborn areas.
“If a peel goes wrong, go back to the membrane, re-tap, and use water to lift it gently rather than digging at the white.”
| Problem | Quick fix | Why it works |
|---|---|---|
| Membrane sticks | Re-tap and peel under water | Water slips between layers, easing separation |
| Shell fragments | Roll gently, start at air pocket | Even pressure keeps large pieces intact |
| Overhandling tears white | Use tongs and a bowl, peel slowly | Less pressure preserves smooth surface |
Common Issues and How to Fix Them Fast
Most kitchen headaches here come down to pressure, placement, or timing. A few quick checks usually fix cracks, rubbery whites, and chalky yolks.
Why shells crack and how to prevent it
Cracking often happens when eggs touch the bottom, are wedged together, or shift while loading the pot. Use a trivet or steamer basket and keep a single layer when possible.
Handle eggs gently with tongs and avoid stacking unless you have a stable rack. These few steps cut the most common causes of a broken shell.
Fix rubbery whites or chalky yolks
These textures usually mean they cooked too long or stayed hot during the pressure release window. Try reducing cook minutes by one (for example, from 5 to 4) and use a separate timer.
Move eggs to an ice bath promptly so carryover heat stops and the yolk stays as intended.
Too many cracks? Try low pressure
If cracking persists, test a low pressure cycle—some cookers behave differently. Run one small batch to tune time and texture for your unit.
Prevent overcooking during release
Don’t let eggs sit in hot water after the natural pressure release. Set a separate timer for the natural period and vent as planned. Promptly transfer to cold water to stop carryover cooking.
| Problem | Quick fix | Why it works |
|---|---|---|
| Cracked shells | Use trivet, single layer, gentle loading | Prevents contact and pressure points during cooking |
| Rubbery whites / chalky yolks | Reduce cook minutes by 1; shorten release; ice bath | Less total heat time preserves tender texture |
| Frequent early cracks | Try low pressure setting and test batch | Lower pressure reduces turbulence inside the cooker |
How to Store Instant Pot Hard Boiled Eggs Safely
Safe storage begins the moment eggs leave the ice bath—act within two hours. In the U.S., move cooked food into the refrigerator within 2 hours to reduce bacterial growth. Quick chilling keeps texture steady and preserves flavor.
Whenever possible, store them unpeeled. The shell acts as a natural barrier and helps prevent the white from drying or absorbing fridge smells.
Refrigeration timing and airtight container tips
Place unpeeled hard-boiled eggs in an airtight container or covered bowl to stop odors and sulfur transfer. Refrigerated unpeeled eggs stay best about 5–7 days, depending on starting freshness.
Unpeeled vs. peeled storage timelines
Peeled hard boiled eggs should be eaten sooner. Aim for 1–2 days after peeling; some sources allow up to 3 days with careful handling.
How to label boiled eggs in the fridge
Write a small “B” on the shell with a food-safe marker so family members won’t confuse them with raw eggs. For peeled eggs, keep them in a bowl of cold water inside a sealed container and change the water daily if needed.
- Use leftovers in salads, make deviled eggs, or chop into egg salad to avoid waste.
- Label with the cook date to track freshness for meal prep.
A Great Way to Get Started on the Right Foot!
14-Day Boiled Egg Diet Plan
Recipe Guide Printable Bundle
Healthy, easy meals laid out for you day-by-day. A simple two-week structure you can start immediately.
- 14 Daily Meal Ideas
- Printable PDF Guides
- Quick & Simple Recipes
- Instant Download
Instant Download! Start Right Away!
Conclusion
Nailing texture and peel comes down to one simple, steady workflow. This method makes hard boiled results repeatable: high-pressure steaming, a short natural release, then rapid cooling to lock yolks and help an easy peel.
Place cold eggs on a trivet, add water to the pot, seal and cook on high pressure. Use a set minutes plan, vent after the timed natural release, then move eggs straight into an ice bath.
Start with 5-5-5 for classic firmness or try 4 minutes for creamier yolks. Use a separate timer to control the release window so eggs don’t overcook while you get distracted.
Peel from the large end, work under the membrane, and use cool water to lift the shell for the cleanest surface.
Make a batch for deviled eggs, salads, or quick snacks. Store unpeeled in an airtight container and refrigerate promptly so you always have protein ready.